![]()
![]()
![]()
![]()
![]()
![]()
|
|
|
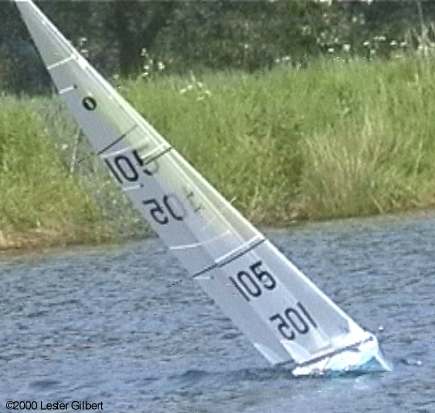
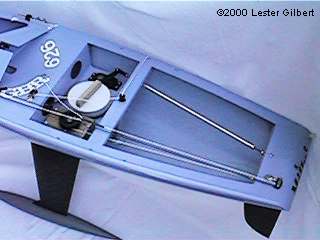
I sail a Graham Bantock-designed and Ian Cole-built Ikon, from those super-professional folk at SailsEtc. I've found her fast, easy to sail, and very flattering of my skippering abilities. My basic tactic is to give her clear air, and she usually manages to do the rest. Some pictures follow the next few paragraphs discussing some points I've had to watch.
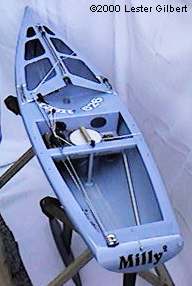
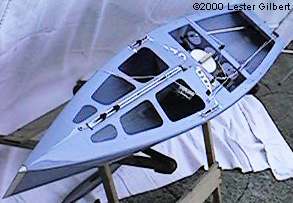
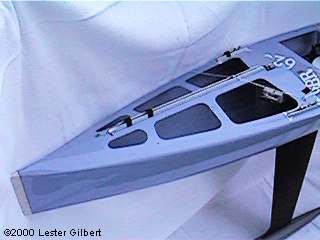
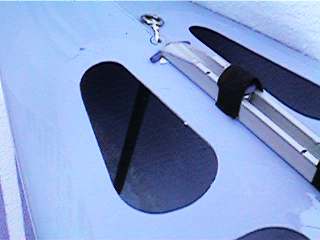
The boat has a very marked change of balance from drifting, upright conditions to driving, fully heeled conditions, which I think is characteristic of the current crop of medium to wide transom IOM designs. She is balanced according to the length of the jibstay (ie mast rake), and I've found an adjustment range of at least 30mm or 1.25" is required on the A rig. If the wind is relatively constant and consistent, there is no problem of course, since she is easily balanced for any particular wind speed. The difficulty occurs if the wind varies much. Balance her for the lighter air, and she develops strong weather helm in the puffs. Balance her for stronger air, and she develops lee helm when drifting. Either way, I've found I need to be alert and actively on the lookout for pressure changes. I've thrown away a number of races at a windward mark that was in a wind shadow. She'd point so well towards the mark that I'd ease my concentration, only to find that she'd slid way off the mark as she came upright and developed creeping lee helm that I completely missed until it was too late. I now prefer to set up for the lighter air, dialling in weather helm that I can at least fight in the puffs by quickly sheeting out. My thoughts on the "theory" of balance are covered on the "Balance" page. The "deck" is really just a set of large deck patches. At the May 1999 ranking event in Yeovil I watched in utter disbelief as an Ikon sank in about 5 seconds. I've not heard any comments on the probable cause, but in my view a deck patch must have come free. The probable patch is one well know to Ikon owners, since it is the one that covers the servo tray opening as well as covering the screw-top "pot" for the receiver and battery. Most of us need to fiddle with the battery and perhaps the frequency crystal before and during an event, and having screwed the pot top back on nice and tight, something makes it very tempting to just smooth the old deck patch back into place as well. The following two pictures show the large open deck hatches. Graham Bantock has reminded me from time to time to either replace my deck patches regularly ("conventional" materials such as Fablon or Vynelia weather badly, become brittle, and split or tear at the slightest injury) or to invest in "proper" materials such as the sticky-backed Dacron he uses, which will last, if necessary, for years. A feature of Ikon manufacture is that the hull is produced in two halves, vertically split. The mast and fin box and the servo tray form a unit, which the two halves of the hull enclose when they are joined together.
The foredeck is quite considerably raised, and so the gap between the fairlead deck eye and the sheet attachment on the jib boom is quite small, perhaps around 15mm. If the deck was flat, this gap would be more like 45mm. My calculations suggest that it is worth reviewing the jib boom sheeting radius -- the distance between the jib boom pivot and the sheet attachment -- if the rig has been transferred from a boat with a flat deck. In particular, the radius might need to be increased 5mm or 10mm for the Ikon, otherwise the main boom sheeting angle doesn't "catch up" to the jib boom sheeting angle on the reach. Check your measurements with the "Sheeting" spreadsheet. The close-up of the fore deck shows a jib track, and two side tracks for the shrouds. These are not standard Ikon fittings. SailsEtc fitted the jib track on request, and I fitted the side tracks myself. The "standard" Ikon provides two stainless "staples" for the No.2 and No.3 rig jib pivots spaced near the No.1 pivot, three for the sheeting fairleads spaced ahead of the mast box, and one each side for the shrouds. My experience is that the "standard" provision is just right, and I would only recommend varying it if you are a dedicated experimentalist. I would certainly suggest, however, that you do ask for extra side staples or chainplate eyebolts for the shroud attachment. The mast rake required to balance the Ikon (see above) varies from around 0 degrees at the very top of No.1 rig, to about 5 degrees for drifting conditions, and an extra staple forward of the standard position will help with 0 mast rake, while an extra staple aft of the standard position will help with 5 degrees mast rake. If you do have a deck track (or even if you don't), be careful that the jib boom still swings over from one side to the other at maximum mast rake. I was caught out in my first drifting event with 5.5 degrees of mast rake. When I tacked, I found the boom stuck on the jib track at the clew, unable to swing over. That was a very red face! I also found that, with drifting conditions and corresponding maximum mast rake, the main boom wouldn't swing out on the run. The weight of the boom kept the main close to the centre-line while the wind was a mere breath, and other boats would ghost past me. A (partial) solution is to have an adjustable jib swivel, so that you can move the whole of the jib aft perhaps 10 or 15mm, thus moving the sails' CE aft 5mm or so, and allowing a less radical mast rake of perhaps 3 degrees. Another solution is to have a second keel for light-air events, whose CLR is 15mm or 20mm forward from "normal". (Of course, you know that once you start an event with a given keel, you have to stick with it for the rest of the event, regardless.)
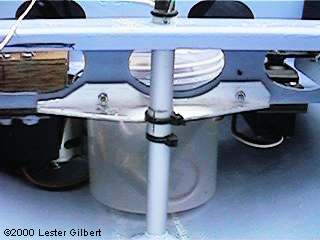
The aft deck photo shows the internal rudder actuating tube, and the screw which attaches the top rudder bearing to the underside of the aft deck can just be discerned. The adjustable main sheeting post is shown in its lowermost position, which is not a "standard" position, but an arrangement I particularly requested. The "standard" Ikon sheeting post is a good 40mm higher. Be sure you can drop the sheeting post sufficiently with maximum mast rake, otherwise the main boom will foul on the post and will not swing over.
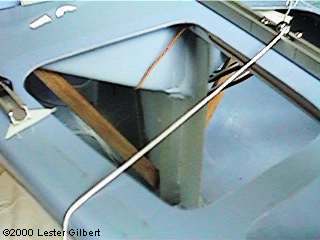
I thought for a long time that my rudder horn was slipping on the stock, since on one tack I'd sometimes have to throw in an awful lot of weather helm, and then on the other tack she sailed perfectly neutral. I've now realised that, close hauled, with the wind at the top of the rig, the sail force on the sheet was such that the servo tray was being flexed out of alignment. As the servo tray moved, the rudder was being pushed to one side, maybe by as much as 3 or 4 degrees. These two photos show the "anti-flex" brace I fitted, to transfer the force to the mainsheet post.
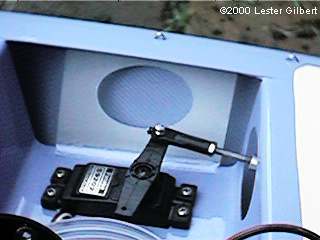
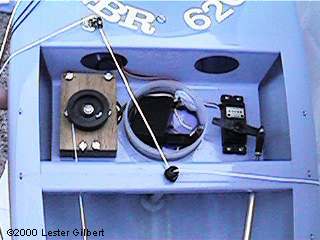
SailsEtc have modified my Ikon to bring it up to their latest specification, by installing their now-current anti-flex brace, a thin sheet of fibre glass at each end of the servo tray bonded to the inwale. Contact SailsEtc if you'd like this fitted to your Ikon. The mid-section close-up shows the servo tray. The "pot" with battery pack and receiver take up the centre of the tray, and an RMG380 winch is mounted on the left in such a way that it can be removed and a Whirlwind substituted as required. Notice the lump of "blue tack" which seals the entry of the servo wires into the pot. There are also three stainless "staples" at the deck edge on either side of the main sheet post; these were extras I ordered in case I wanted to play with main boom sheeting arrangements that didn't involve the standard sheeting post.
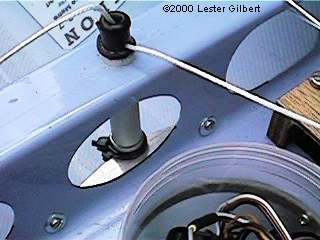
The raised foredeck is extended into a flange that overlaps the mast to form mast "partners". The mast ram can just be seen in the slot in the flange. In the picture, this mast ram is augmented by my addition of a "U"-shaped clip. I've now removed this clip, and instead placed it as a permanent "deck fitting" on the mast. In this position, it acts as mast "chocks", adding lateral stiffness to the mast and almost eliminating lateral mast bend. Having a ram and partners well above the mast heel (about 150mm) gives an extraordinary range of tuning for the Ikon's fore-aft mast bend, and adds tremendous lateral stiffness. In combination with the improved sheeting geometry for the jib, I currently think that the raised foredeck is the "trump card" of the Ikon design. On the run, it is the kicking strap which comes up against the foredeck flange, keeping the mainsail somewhat off the spreaders. To provide room for the gooseneck body between the flange and the deck, the deck is dished and recessed around the oval mast box. You will want to be sure that the kicking strap is placed as low as possible, so that the main boom can swing through its maximum sheeting angle, about 80 degrees, before being arrested. Because the main does not sheet out to a full 90 degrees (or more), the boat is quite sensitive to being on the right gybe on the run with the wind on an aft quarter rather than directly over the stern, particularly towards the top of No.1 when mast rake is 0 or 1 degrees (and thus the main is arrested at about 75 degrees). If you are on the wrong gybe, other boats will pass you, and it took me an awful long time to cotton on to this (well, they weren't going to tell me, were they). I just thought that the wider beam was a known disadvantage on the run (which is exactly what they did tell me, wasn't it! Will I never learn?). Practice being able to set a gybe cleanly and quickly as required on the run, and change gybe if ever you're looking a little slow. (More skilled skippers than I will have to tell us if full-blown downwind tacking is worth it with a beamier IOM, but it seems unlikely as far as I can see, though not out of the question.) Finally, you will want some sort of mechanism that closes the end of the flange/partners "box" once the mast has been stepped, otherwise the sheets can get caught up on the flange/partners edge. I just tape over the gap with some (very good quality waterproof) sticky tape. The on/off electronics switches are located underneath the flange; their waterproofed bodies can just be glimpsed through the left deck hatch, below the jib sheet.
The close-up of the foredeck interior shows the mast and fin box, with braces, and the interesting location of the radio aerial -- running the length of the foredeck just below the jib track.
The No.1 rig jib pivot arrangement is somewhat unusual. The photo shows the ring which attaches to the jib boom, and the thread which provides the jib pivot itself. The thread runs down the tube (dimly seen, you might have to turn your brightness up) and is secured at the tube's base. Be sure that you can replace this thread yourself if necessary in-between heats. I dropped the boat at an event once and the force snapped the thread (as well as cracking the hull and bending the bulb -- ouch!). I managed to sail on, but only because I had a very long sewing needle "threader" that could run the whole length of the tube, allowing a fix in three minutes. Black tape covers the No.2 and No.3 jib pivot eyelets to prevent any line hang-ups, a problem that does not occur with the standard stainless "staples".
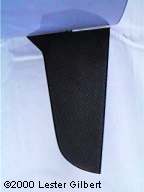
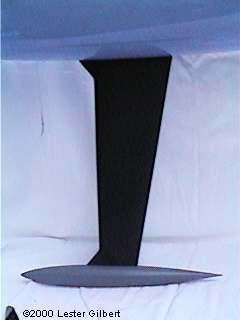
The rudder and fin have leading edge fillets or LERX -- leading edge root extensions. These are also not standard Ikon features, but have been added on request. I don't know that they modify the performance of the boat much, but they certainly look good. Some views on these are presented in the "Planform" page. The bulb is the new SailsEtc "skinny" version, with a length to thickness ratio of around 10. The brass rod which runs the length of the bulb does an excellent job of keeping the nose, and trailing edge, free of gouges and scratches.
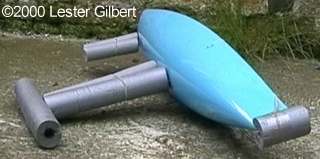
Here is some use for all that pipe lagging left over from winter...
2005-12-18 |
|
©2025 Lester Gilbert |