![]()
![]()
![]()
![]()
![]()
![]()
|
|
|
Joe's neat trick was to make the pre-tension torque on the arm constant through the arm's movement, so that it does exactly the work you want it to do, no more and no less. Joe suggested that the pre-tension should be around 75% of the winch's rated torque. Then, when sheeting in, you get around 175% of the winch's torque to help pull the sails in. To keep the pre-tension "constant", the spring needs to work around a cam. The cam radius is larger when sheeted in (because the spring tension is lower), and then the radius goes lower when sheeted out (because the spring tension increases). In the diagrams, the green line is either a conventional wound spring, attached by a length of cord to the purple cam, or a run of thick elastic. At close-hauled, the spring (green line) has a certain tension, and as the arm (red) moves away onto the run, the spring is stretched and its tension increases. To maintain constant torque, the cam (purple) radius gets smaller in proportion. . Of course, we need a spreadsheet Cam.xls (36 kb), to calculate the shape of the cam. This spreadsheet calculates the cam given a couple of inputs. First, it wants to know the rated torque of the winch, and what % of this you want to use as pre-tension. Then, it wants to know the starting tension in the spring or elastic at close-hauled. Finally, it wants to know the elasticity of the spring -- that is, how much the tension increases for a given amount of stretch. Pop these numbers in, and out comes a suggested cam shape.
For example, this cam measures about 80 mm from heel to toe, the radius starting at about 57 mm for close-hauled and dropping to 29 mm for the run, and it is specific for the Hitec 1/4 scale digital winch rated at 19 kg-cm, if you have a starting tension of 2.5 kg on your spring and an elasticity which sees the tension increase by 200 gm for each 10 mm of stretch. You can play with the spreadsheet, and try different starting tensions, in order to get the "right" size of cam. And, it doesn't really matter if you work in metric or imperial measurements. Then, given the cam, the second page of the spreadsheet allows you to see what happens if you use this cam with different tensions and elasticity. For example, in light winds, you might want to ease the tension off the spring or elastic. The graph shows you the resulting pre-tension as the arm rotates, with the red line set at 75% for reference. This graph shows the pre-tension if the elastic is slackened to 1.5 kg when close-hauled, keeping the same elasticity.
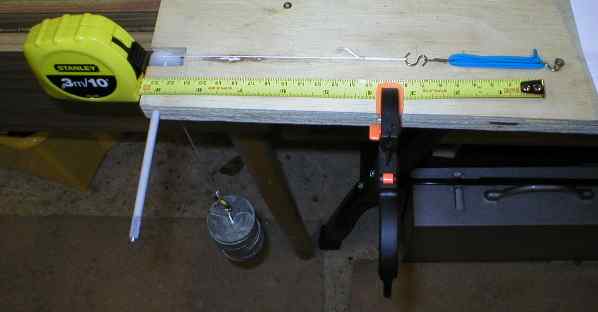
UpdateI've cut a cam to a shape dictated by the spreadsheet, and installed it in my boat. We'll see if it helps! The "spring" is 2.1 mm dia "roach pole" elastic. I've tested 4 and 6 strands, and am starting with a 45 mm length of 4 strands. This is the "test bench" -- hook up the elastic, suspend weights, measure stretch, compute modulus of elasticity.
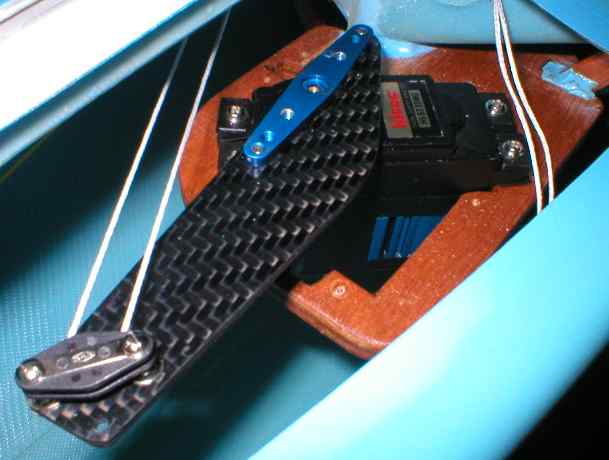
My winch installation is forward of the bulkhead. The photo shows the SAILSetc carbon arm fitted to the underside of the Hitec aluminium arm, and the winch set at the close-hauled position.
The cam is pretty agricultural -- 5 mm thick wood cam sandwiched by 1.5 mm thick aluminium plates. The idea is to provide a secure "groove" for up to 6 strands of 2.1 mm elastic to follow.
The final picture shows the cam installed on top of the blue aluminium arm, and the elastic taken to the bulkhead.
2005-12-18 |
|
©2025 Lester Gilbert |